by
User Not Found
| Jun 17, 2016
This guide is for users of Microsoft Windows 7 and assumes that you have a rewritable DVD drive.
1.) Insert a blank DVD into your DVD drive.
2.) On your PC, navigate to the file you want to burn to disc.
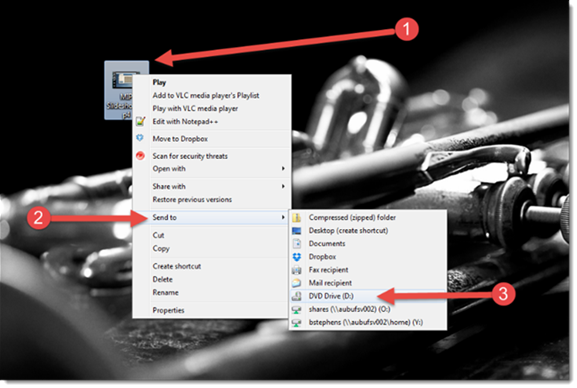
3.) Right click on the file, hover over to “Send to,” and select the DVD drive from the menu.
(In the example, the file is saved on the Desktop.)

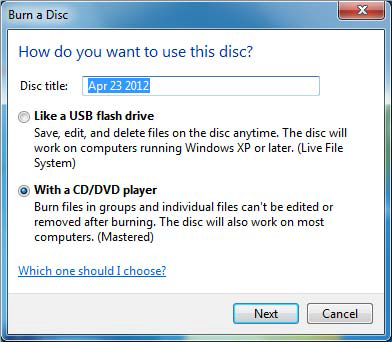
4.) On the “Burn a Disc” pop‐up box, type in the title of your disc. Name it whatever works best to identify the contents you will be saving to the disc.
5.) Select the option “With a CD/DVD player.”
6.) Click “Next.”

A screen will appear that identifies the files that are ready to be written to the disc.
NOTE: These have NOT been saved to the disc yet.

7.) Highlight the files that you will be burning to the disc, then click on the “Burn to disc” button found in the top menu.

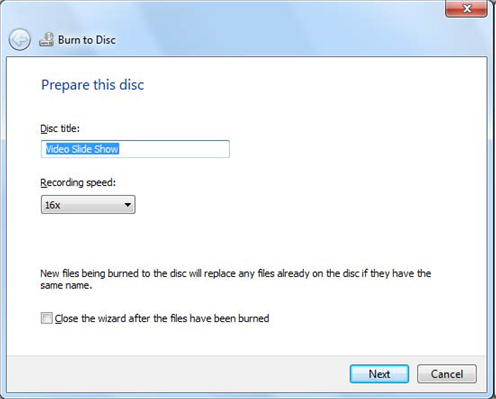
8.) In the window that appears, you can give your disc an appropriate title.
9.) Click “Next.”

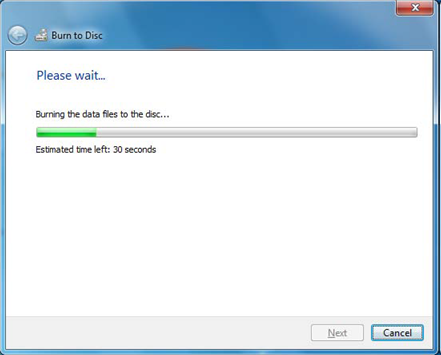
10.) Your video slideshow is now writing to the disc. When finished you do have the option of burning additional copies; when complete, the disc should eject itself. Just click “Finish” and you’re done!
