by
User Not Found
| Jul 18, 2016
1. Create an Apple ID
You will need an Apple ID to install the Expression app on your iPad(s). If you do not have one you will need to Create an Apple ID.
Note: This can be done on the iPad but the process is done much easier on a PC
1. You must have an Apple ID to download an App from the App Store. You can create an apple ID with a credit card on file or not. If you are giving these credentials out, you may not want a credit card attached. Follow the alternative method: Create Apple ID without Credit Card
2. On a computer, go to https://appleid.apple.com and click Create an Apple ID
3. Follow all steps on the site and make note of your email address and password used. This will be your Apple ID and password.
4. Before your Apple ID is active, an email will be sent to your email address asking to confirm your account. Confirm your account via the link on the email. You will need to enter your Apple ID credentials. Your Apple ID is now active.
Alternate Method: Create Apple ID without Credit Card
Following these steps will allow you to create an Apple ID without a Credit Card on your account. Any users that know your APPLE ID will not be able to make purchases.
1. For this method, you will need to have iTunes installed on a computer. If you do not have it, Download and install here: http://www.apple.com/itunes/download/
2. After iTunes is installed, open iTunes. In the left-hand side menu, click iTunes store.
3. At the top of the iTunes window, click App Store.
4. Find a free app, any free app, and click on it. On the app's information screen, click the Free button.
5. Make sure that there are no other Apple ID accounts signed in. Logout
6. It will ask for your Apple ID and password to download. Click the "Create Apple ID" button.
7. Go through all the steps in iTunes to create your new Apple ID.
When you get to the part asking your payment information, make sure the None button is selected under payment options.
8. Before your Apple ID is active, an email will be sent asking to Verify your email address.
9. After you verify your email address vial the Verify Now link on the email, your account will be active.
2. Connect iPad to WiFi
Connect iPad(s) to your Wi-Fi network.
Note: If you do not have Wi-Fi at your location and are running only on cellular data, see either option:
iOS 6
1. Click the Home button. This will bring you to the home screen.
2. Open the Settings app, on the left hand side menu, tap "Wi-Fi".
3. A list of available networks will display below. Choose the network you would like to connect to and Select it (B).
If Wi-Fi is "Off", enable it by switching to "ON" (A). This list of networks will refresh and than appear.
4. Enter the Wi-Fi Password (A), if the network is secure, and click "Join" (B)
5. If the password was entered correctly, you will be connected to that network. A checkmark will be next to the network you are connected to in the Wi-Fi network list.
iOS 7
1. Click the Home button. This will bring you to the home screen.
Tap Settings > Wi-Fi
2. When Wi-Fi is on, your device will automatically search for available Wi-Fi networks. If the Wi-Fi switch is off, flip it on.
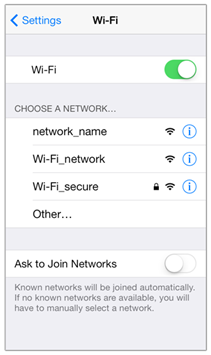
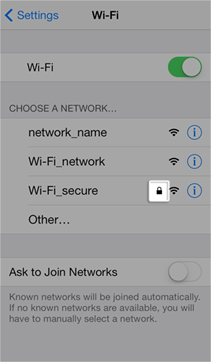
3. Tap the name of your desired Wi-Fi network. A password-protected network will have a lock icon to the right of the network's name.
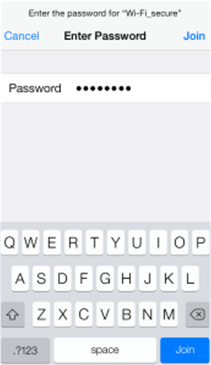
4. You will be prompted to enter the password. Enter the password for the Wi-Fi network. Tap Join.
Note: If tapping Join has no effect, the password you have entered is too short. If you do not know the password to the secured network, please contact your network administrator.
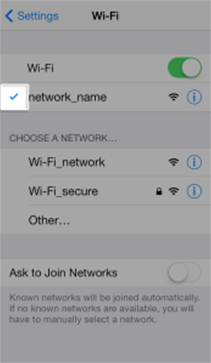
5. When your device is connected to a Wi-Fi network, a checkmark will appear to the left of the network name. The Wi-Fi logo will appear in the status bar at the top left of your display.
Verizon: How to set up a new Cellular Data account on iPad
Instructions on how to activate a Verizon Wireless Cellular Data plan in the Unites States on an iPad 2 Wi-Fi + 3G for Verizon.
Follow these steps to set up your new Cellular Data Account:
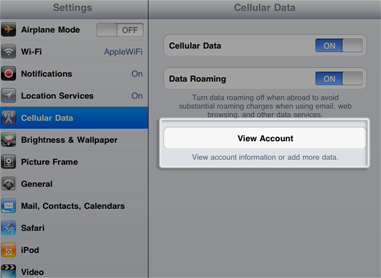
1. Tap Settings > Cellular Data > View Account:
2. The Cellular Data Account management window appears. Enter information or select an option in the following sections and tap Next:
User information: Enter your first and last name and your phone number.
Log-in information: Enter and verify an email address and a password. This creates a Verizon account, allowing you to lot in to the account later to make changes to view your usage statistics.
Recurring domestic plan options: This allows you to choose the size of the plan you want to use. Rates and other details of Verizon's plans are subject to change, so consult with Verizon for applicable details and requirements.
Payment and billing information: Complete this section with the billing information you'd like to use to pay for your Cellular Data account.
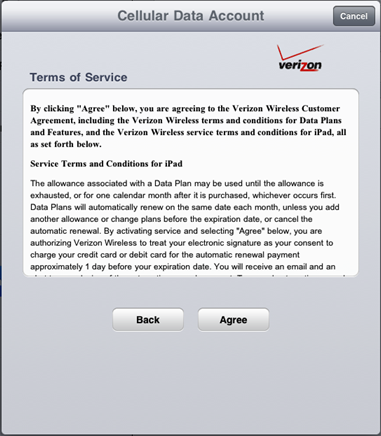
3. The Terms of Service agreement loads. Take a moment to read this agreement.
Tap Agree to continue.
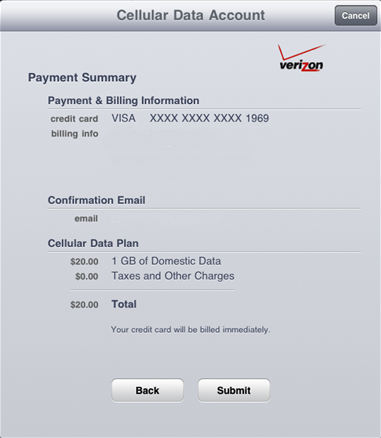
4. The Payment Summary screen appears. This shows you a summary of the account and plan you have selection. Tap Submit to complete the creation of your Cellular Data account.
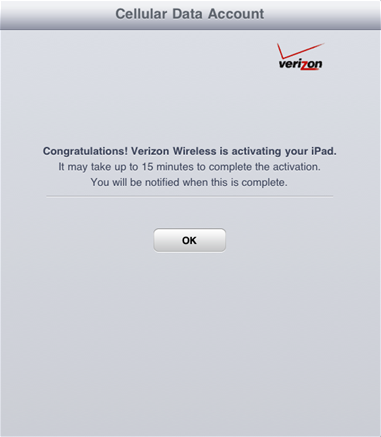
5. The Congratulations screen appears. This lets you know that your account has been created, and that Verizon Wireless is activating your iPad. Tap OK to finish and return to the Settings screen.
6. Your iPad will notify you when your Cellular Data connection has been activated.
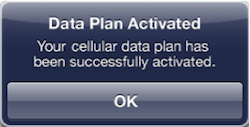
While waiting for this activation, you can use your iPad 2 Wi-Fi + 3G on Wi-Fi.
Additional Information
Notes:
-
The Cellular Data account sign-up process is managed by Verizon. If you have questions, concerns, or problems with this sign-up process, please contact Verizon.
The Cellular Data account sign-up process is managed by Verizon. If you have questions, concerns, or problems with this sign-up process, please contact Verizon.
If you need to change or correct your email account information, please contact Verizon.
A unique email address is required to sign up for your Verizon account. If you plan on setting up cellular data accounts for multiple iPads, you must use a different email address for each account.
-
Reference: http://support.apple.com/kb/HT4571
Reference: http://support.apple.com/kb/HT4571
AT&T: How to set up and manage a Cellular Data account on iPad
Follow these steps to set up or manage your new At&t Cellular Data account.
1. Tap Settings > Cellular Data > View Account:
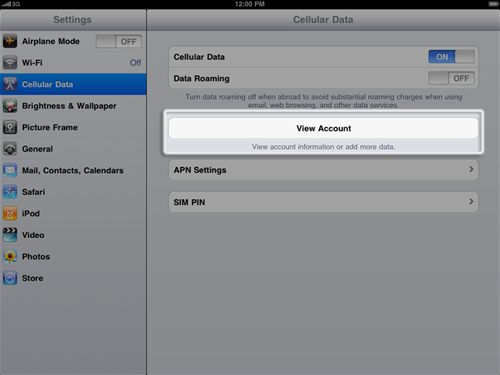
2. When the Cellular Data Account management window loads, tap Set Up New Account.
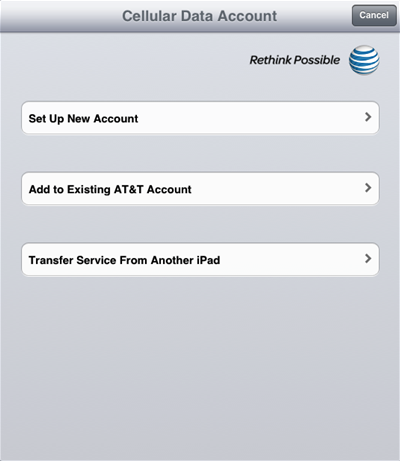
3. Enter the required information and select a plan option. Tap Next when you are finished.
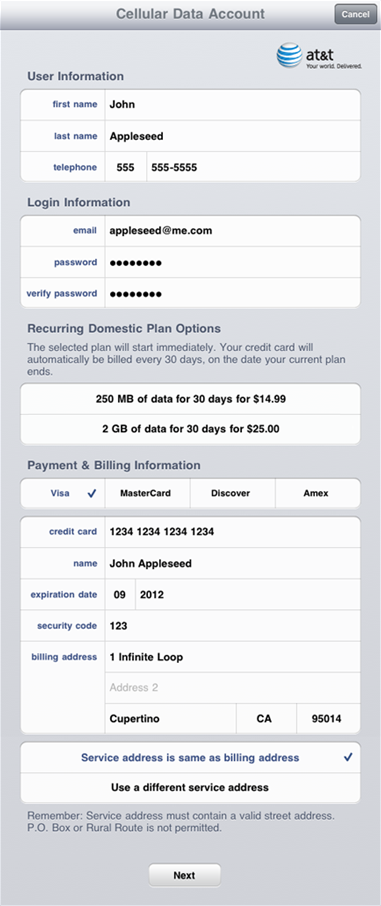
Note: Data Plan pricing and availability vary by device and may change. Contact your carrier for more information.
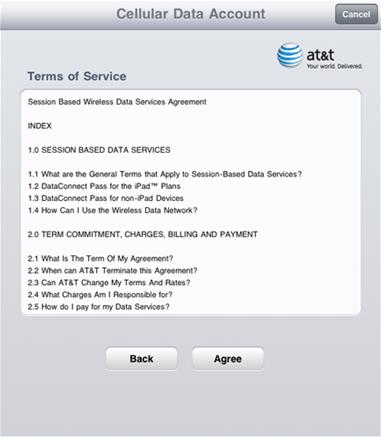
4. When the Terms of Service agreement loads, take a minute to read this agreement. Tap Agree to continue.
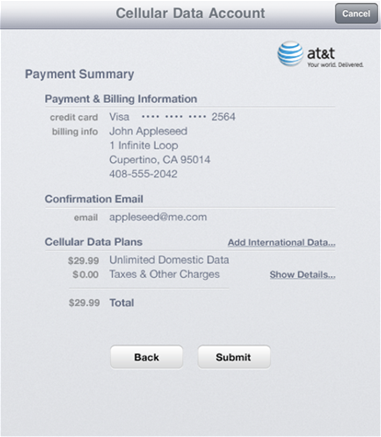
5. The Payment Summary loads, displaying a summary of the account and plan you chose. Tap Submit to complete the creation of your cellular data account.
Note: You can also add an International data plan on this screen by tapping Add International Data, or you can access your account later to manage your plan options. If you need to use your iPad internationally, you must sign up for the international data play while in the United States.
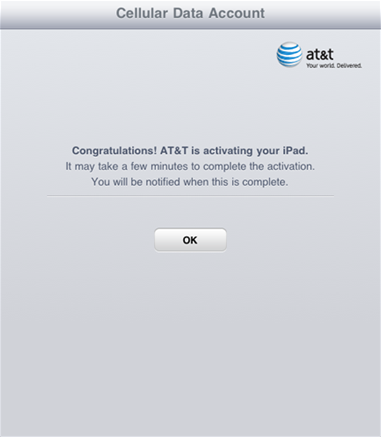
6. The Congratulations screen appears, confirming that your account has been created, and that AT&T is activating you iPad. Tap OK to finish and return to the Settings screen.
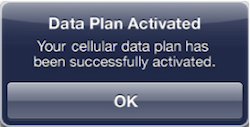
7. A few moments later, your iPad should notify you that your cellular data connection has been activated.
Additional Information
Contact your carrier if you have any questions about your plan or service.
3. Install the Expression App
You will need to install the Expression app on all iPads that you plan on using for digital registry.
Both Expression Guest Registry and FloralXpress are found on the App Store, and are free to install on your iOS devices.
Note: Expression Guest Registry is not available for the iPhone.
1. In the App store, on your iPad, search for Expression Guest Registry or FloralXpress.
2. Next to the app you will see a "FREE" button. Tap FREE.
3. The FREE button will turn to "INSTALL APP" , Tap INSTALL APP.
4. Enter you iTunes password, tap "OK".
5. Click the Home button, the Expression or FloralXpress App will now be on the home screen.
4. Adjust iPad settings: Optimal Settings
Here are a few suggested iPad settings to adjust for the best experience for your guests while using Expression. All these changes are optional, but will provide a better experience for your guests and staff. Some settings are more important than others (indicated with an *).
The following items are located in the iPad's Settings App:
-
Set Auto-Lock to NEVER*
-
Turn Multitasking Gestures OFF*
-
Turn Auto-Brightness OFF*
-
Set Brightness level*
-
Turn Notifications OFF*
-
Turn Bluetooth OFF**
-
Turn Keyboard Shortcuts OFF*
* provides best guest experience
** extends battery life
Set Auto-Lock to Never
Auto-lock is great for personal use because when the iPad is not being used it locks and turns the screen off which saves battery life. However, we do not want this to happen while guests are needing to register for a service. You will want to turn this feature off while using your iPad for electronic registering.
1. In the Settings App, on the left hand menu, tap General. On the right side, scroll down to Auto-Lock, tap it. This will bring you to the time select screen.

2. Select Never, the check mark will appear to the right.
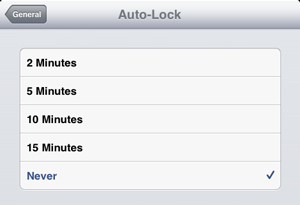
3. Auto-Lock is now set to never lock. To escape, tap the General button at the top of the Auto-Lock menu or simply press the Home button.

Turn Multitasking Gestures OFF
Multi-Gestures are a great feature of iOS but allow for users to escape from apps without needing to push the home button. This can screw up a guests experience if someone either intentionally or unintentionally uses these gestures. It is best to turn these off.
In the Settings App, on the left hand menu, tap General. On the right side, scross down to Multitasking Gestures, flip the switch to the OFF position. Multitasking Gestures are now off.

Gestures ON

Gestures OFF
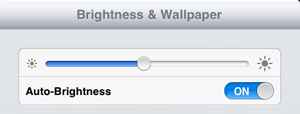
Turn Auto-Brightness OFF
Auto-Brightness is needed when changing lighting environments often and can help save on battery life for personal use. When using as a kiosk you do not need the brightness level to change. The Auto-brightness feature is also known to be quirky and can change with no reason and get stuck on a different level. It is best to turn this off and set the best brightness level manually for the environment.
In the Settings App, on the left hand menu, tap Brightness & Wallpaper. Flip the Auto-Brightness switch to OFF.
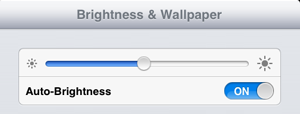
Auto-Brightness ON
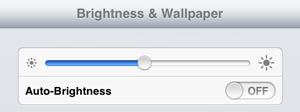
Auto-Brightness OFF
Set Brightness level
The brightness level is very important in the guest experience, and it also directly affects battery life. The brighter it is set to the shorter the battery life will last. It is best to set this at a level for your environment, not too bright and not too dark. The brightness level will most likely need to be changed if used in different locations, such as a cemetery or church.
You will need to have the Auto-Brightness feature turned off to manually adjust the brightness level.
In the Settings App, on the left hand menu, tap Brightness & Wallpaper at the top, drag the slider bar left or right. Dragging left will dim the screen, right will brighten it.

Minimum brightness

Maximum brightness
Adjust to an optimal brightness for the kiosks location.
Notifications
The "Notification" area was introduced in iOS5 and can be intrusive to your guests kiosk experience if they pop up. We suggest you turn these off while using a service.
Turn Notifications OFF
There are two ways to turn off Notifications. If using iOS6, you can turn on Do Not Disturb mode which turns off all notifications. If you are using an older iOS, you will need to manually turn off each of your installed app notifications in the Settings app.
Check your iOS version
The current version is iOS 8.1.3
Go to the Settings App. In the left hand list tap General. In the right window tap About.
The About menu has a lot of information on your iOS device including amount of storage available, serial number, and iOS version. The iOS version number is listed to the right of Version.
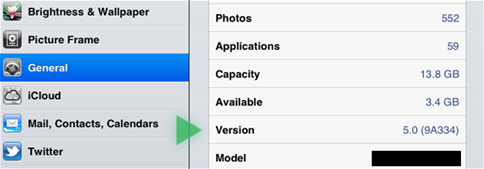
The above image shows that the iOS version is on 5.0
Turn on "Do Not Disturb" mode (only in iOS6+)
"Do Not Disturb" mode turns off all messages, alerts and notifications. It is considered a temporary solution and may be turned back on.
In the Settings app, on the left hand side flip the "Do Not Disturb" switch to off.
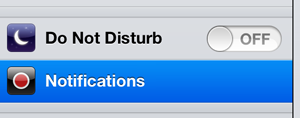
Do Not Disturb Switch
Turn off individual notifications
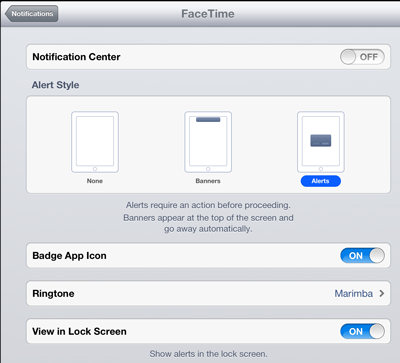
For each app installed, you will need to turn off the notification settings for each.
1. In the Settings App, on the left hand menu tap "Notifications".
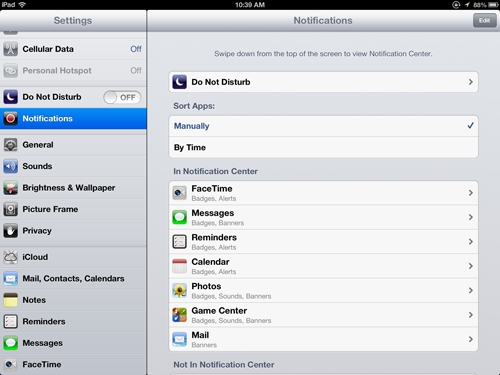
2. Tap each app in the menu above and flip the "Notification Center" switch to off.
Turn Bluetooth OFF
Bluetooth is used to connect to devices such as hands-free headsets, keyboards, and car stereos. Having this powered off will help extend the battery life.
In the Settings app, on the left hand menu, tap Bluetooth.

Flip the switch to the left to turn OFF. Bluetooth power is now off.
Bluetooth ON

Bluetooth OFF
Turn Keyboard Shortcuts OFF
Keyboard Shortcuts when enabled, will add an extra row of buttons to your iPad's screen keyboard. This makes the keyboard taller, and will block the full view of some entry fields in the Expression Guest Registry App.
Turn off Keyboard Shortcuts by tapping the Settings icon > tap General on the left side > tap Keyboard on the right side > then make sure the Shortcuts are switched OFF.
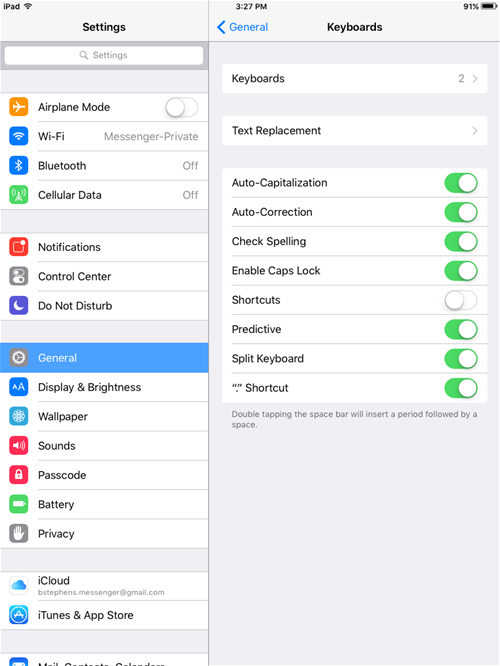
Keyboard Shortcuts OFF